
Why are my Facebook Ads not converting? You run an ad to promote your Shopify store, hoping to get hundreds of sales. Instead, you get a handful of visitors and, even worse, no sales.
You’re not alone. A study from Weebly several years ago found that 62% of small businesses found their ads didn’t hit their targets.
With over 2.7 billion people on Facebook, you’d think any ad work grab someone’s attention. The problem is, you don’t have an unlimited budget, and so if you don’t put your ad in front of the right people, odds are no one will notice it.
“One of the main reasons marketers fail with Facebook Ads is because they fail to target their ads properly,” wrote marketer Neil Patel. That’s the key to making your Facebook Ads bring actual customers to your Shopify store.
You need to find people who want your products, and for that, you need Facebook Custom Audiences.
Here’s everything you need to know to place your ads in front of the people who are most likely to buy your products by building Facebook Custom Audiences from your existing Shopify customers and be in the 38% of successful Facebook advertisers
What are Facebook Custom Audiences?
“A good customer profile relies on objective information to describe shoppers, often segmenting them around the reasons they choose a company or product,” wrote Practical Ecommerce contributor Armando Roggio. That’s what Facebook Custom Audiences help you build.
You could run an ad on Facebook and guess who your best customers would be. Maybe most of your customers live in a certain region, and you guess they’re around a certain age. Perhaps they work in a specific industry or are more likely to have children. Facebook lets you choose these and other attributes to build an audience for your ad.
Or, you could let Facebook do the guesswork for you with a Facebook Custom Audience, which targets people on Facebook who are similar to your existing customers.
Facebook can watch your Shopify store, see who visits, and build a custom audience from those people. Or you can send your customer list to Facebook. The social network will then find what those people like and what makes them similar, and use that to build a list of new people you could target.
Once Facebook has a bit of data from your Shopify store, with Custom Audiences you can retarget people who have interacted with your business already, including those who visited but didn’t purchase yet, and can also find new potential customers who are the most similar to your best customers.
How to make a Facebook Custom Audience from a Shopify store
The quickest way to get started building Facebook Custom Audiences is with a Facebook Pixel, a snippet of code you can add to your Shopify store. Add that to your Shopify store, and Facebook will notice every person who visits, and will turn them into a Custom Audience.
Let’s add that to your Shopify store first, then see how to target your ads even better by importing your customer list.
- Create a Custom Audience Pixel
First, you’ll need a Facebook Business account (Open one here if you don’t have one already), and then you’ll need to create an audience. Facebook has four Custom Audience options to choose from: Website, customer list, app activity, or offline activity. Choose Website, then follow these steps to install it on your Shopify store.
Then you’ll have to wait a bit. You need at least 20 people to visit your Shopify store before Facebook can build a custom audience. So wait a few days, ideally until at least that many people have visited, and perhaps a few have made a purchase.
- Create a Custom Audience
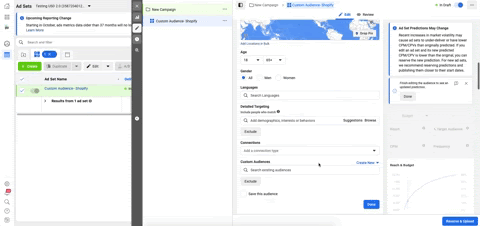
Now you’re ready to build a new Facebook Ad campaign with your new audience. Open your Facebook Ads Manager, create a new campaign, and choose an objective. You want people to visit your Shopify store and ideally buy something, so choose Conversions.
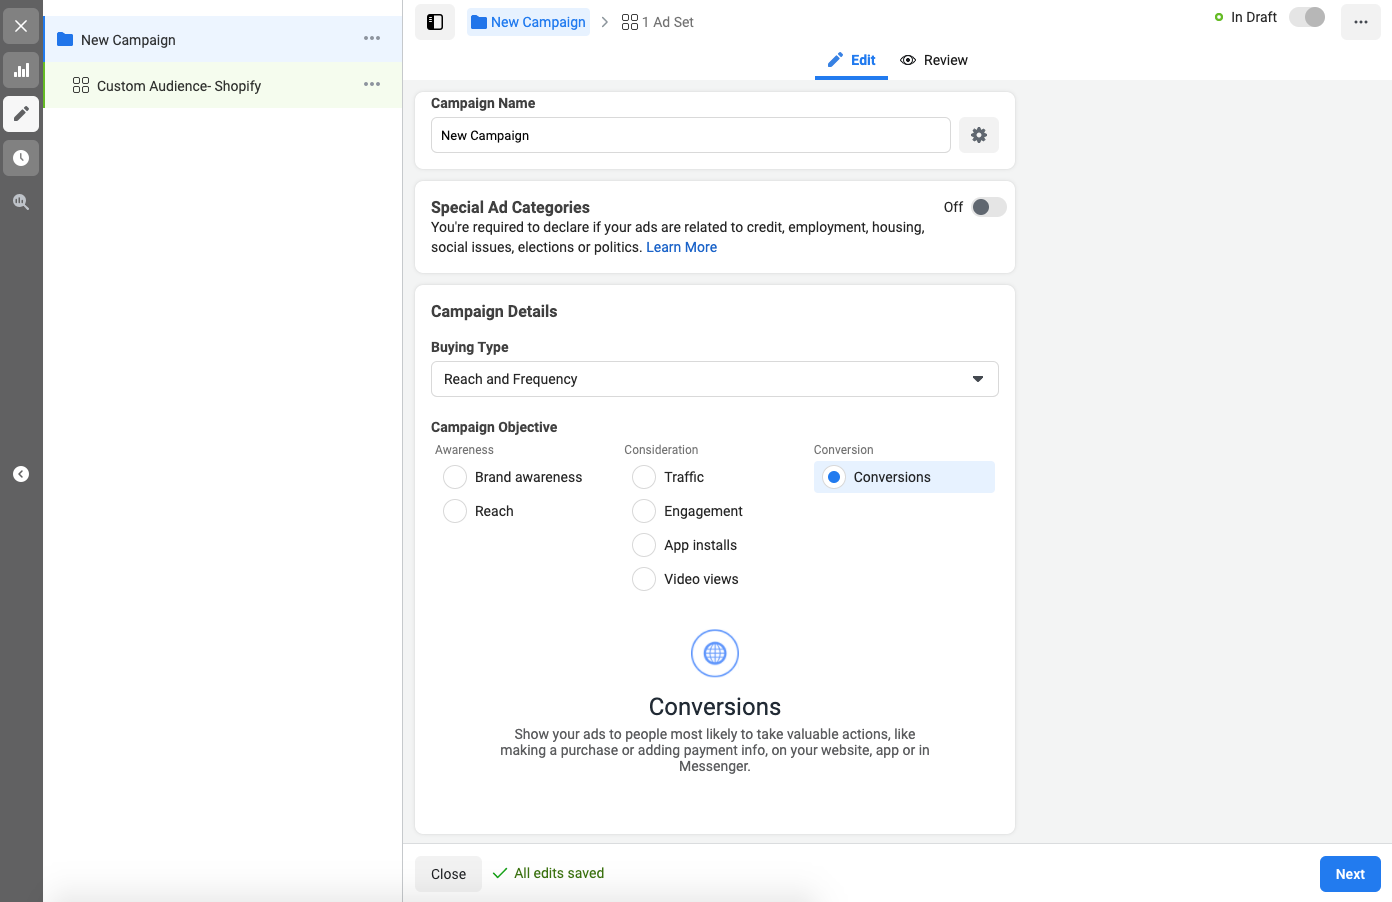
Next, select the conditions for this Custom Audience. You can target all website visitors, only people who viewed specific pages, or only people who spent an amount of time on your site, based on people who visited your store in the past 180 days.
If you’re advertising a site-wide sale, all website visitors are worth targeting. If you want to promote a specific product, targeting people who visited that product’s page might get better results. Pick what seems best for this ad campaign.
- Finish creating your ad
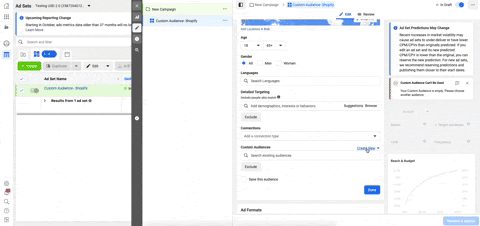
Then it’s time to build your ad itself. Add the post copy and creatives, including photos and/or videos to catch people’s eye. You can also add more detailed targeting to dig deeper and advertise only to a subset of your Shopify visitors. For example, if you sell vintage t-shirts, you could have Facebook only show the ad to people who both visited your store and are interested in vintage shops and thrift stores.
Now you’re ready for what hopefully will be the best performing Facebook Ad your Shopify store has seen so far. You’ll be able to put your store back in front of people who were already interested in it, and hopefully convince them this time to buy something.
But that’s only the first level of Facebook ad targeting, one that relies on your Shopify store to already have a large audience.
What if you’d like to find more people who have never seen a specific product, but are most likely to buy it based on customers who have similar shopping patterns?
One of the easiest ways to build this is with Datagran by adding an RFM analysis to your data workflow and export the outcome to your Facebook Ads account Custom Audience. On Facebook, you can also create lookalike audiences from this new list to expand the size of your audience and increase your conversion rate. If you want to hop on this right away, check out these two tutorials on RFM analysis and Recommended Product Operators.
In this article, we will keep it simple by learning how to create Custom Audiences from Shopify to use on Facebook Ads.
How to find people just like your best Shopify customers with Datagran
Datagran connects your Shopify store more deeply to Facebook Ads than a Facebook pixel alone could. It can copy your customers, find their most important traits, send them to Facebook, and turn them into a Custom Audience. Then, you can build a Lookalike Audience in Facebook to target your ad to new people who are similar to your best customers
The first step is to connect your Shopify store to Datagran. Then you can use your store’s information—including customer’s emails—to build a Custom Audience in Facebook Ads account. You can then build a campaign to retarget your best customers or to let Facebook find other people similar to your best customers, for more targeting power over who will see your ads.
Here’s how:
- Connect your Shopify account to Datagran
If you don’t already have one, sign up for a Datagran account. Then select your workspace (or create a new one), add a project, head over to Integrations, and click on Add Integrations to connect your Shopify store.
Box: New to Datagran? Check this video to learn more about Integrations and how to set them up.
If you haven’t connected your Shopify store yet, click on the plus sign to add an integration, and select Shopify. Enter your Shopify store’s name and website, and log in to your Shopify account to connect it to Datagran.
Tip: Datagran will then ask you to choose the streams of information you want to pull from your Shopify store.
Streams of information are the type of data collected from your store, so in this case, you want to make sure you select streams relevant to your Custom Audience strategy. For example, you’ll want to pull information from customers, abandoned checkouts to target those customers, orders, and even order refunds. You will then be asked how often you want it to pull data from your Shopify store—select DAILY as your frequency.
- Create a Facebook Custom Audience, based on your Shopify data
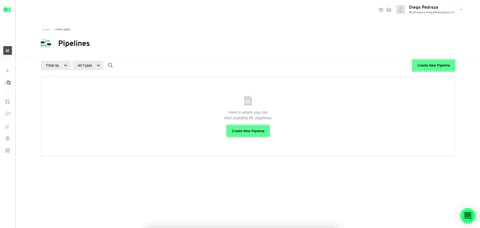
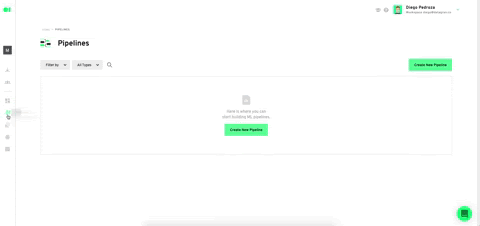
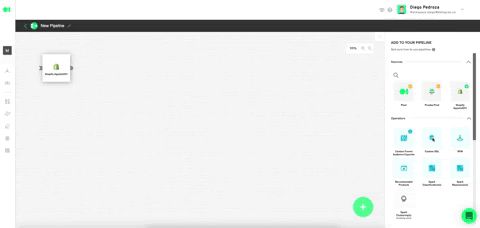
Now that Datagran has your Shopify data, it’s time to turn it into a Custom audience. To do that, you’ll need to make a new Pipeline—or automated workflow—and add the data sources you want to extract information from Shopify.
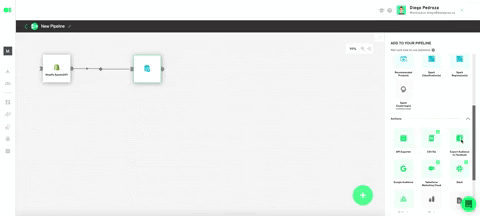
Drag in your Shopify data from the right sidebar, then drag and drop a Custom SQL Operator to see what’s inside of your Shopify data and select specific types of information from your Shopify store. Click the Edit button, select the source, the table and the specific variable within that table, such as customers, products, or orders. For a custom audience, you’ll want to add your Customers.
Select your Shopify store, drag the customers item into the editor, then run the query and save the table. Now go back to the pipeline and press Play to run the workflow and build your custom audience.
Now let’s send that custom audience to Facebook. From the Actions section in the sidebar, drag the Export Audience to Facebook Action into the canvas, and click Edit.
Select your Facebook business account.
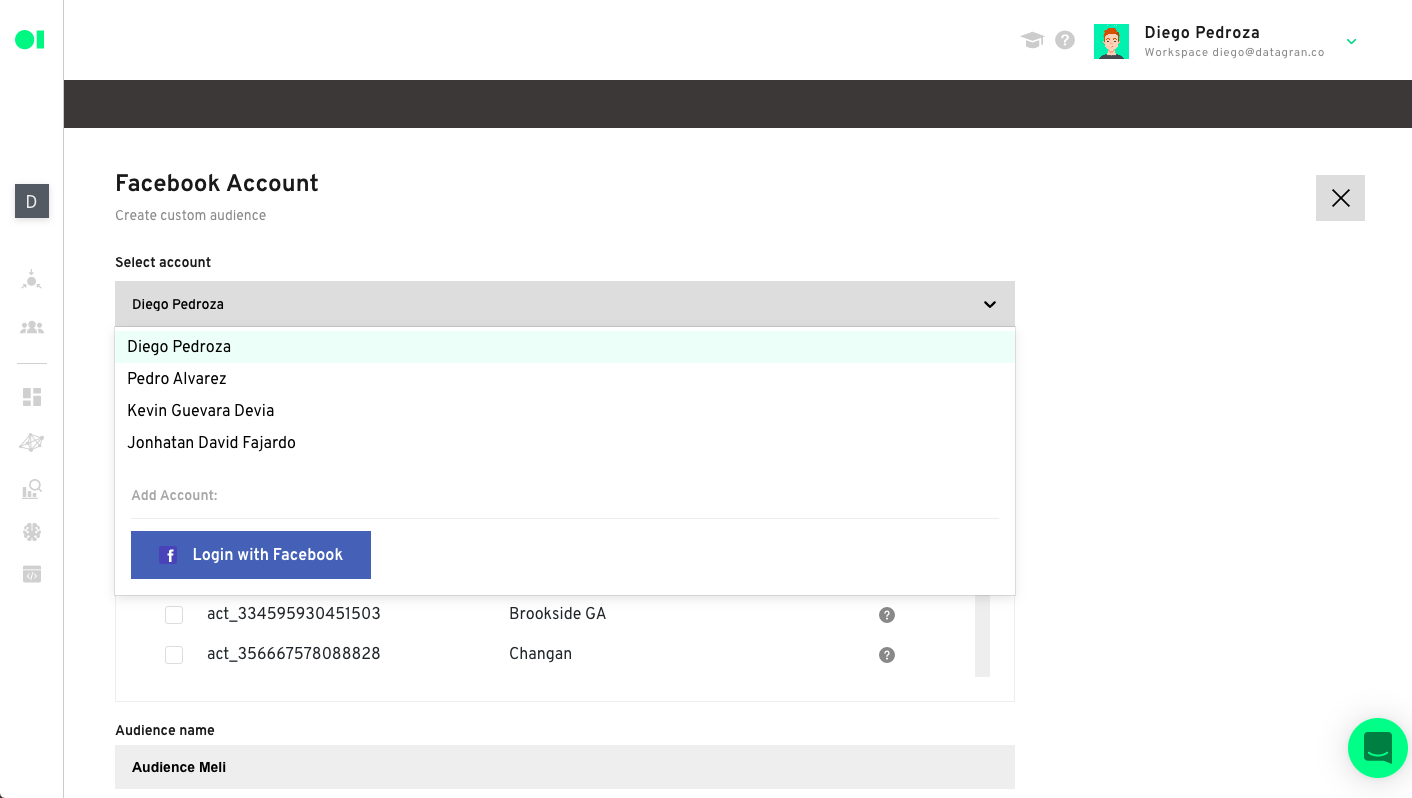
Now, choose your Facebook Ad Account from the dropdown menu.
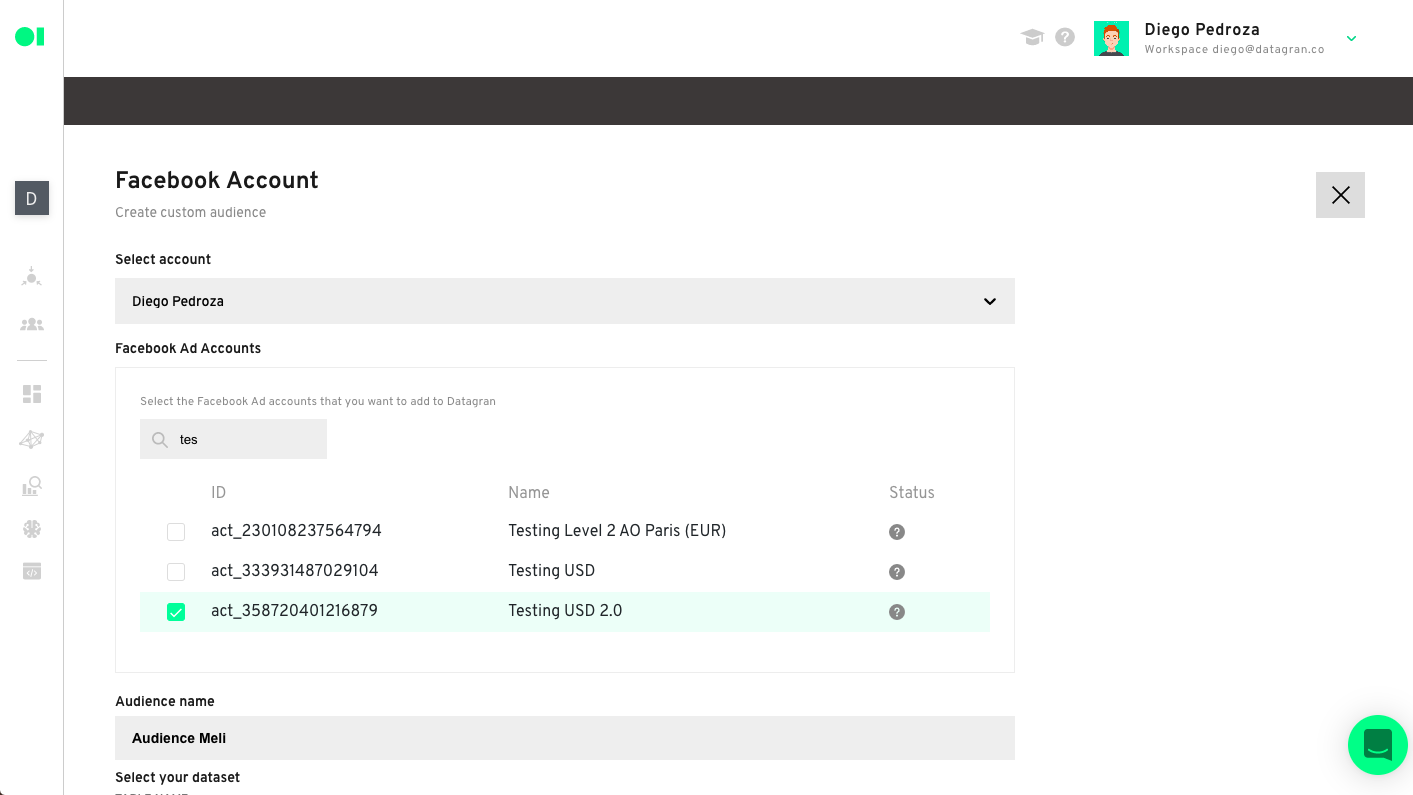
Name the target audience anything you’d like.
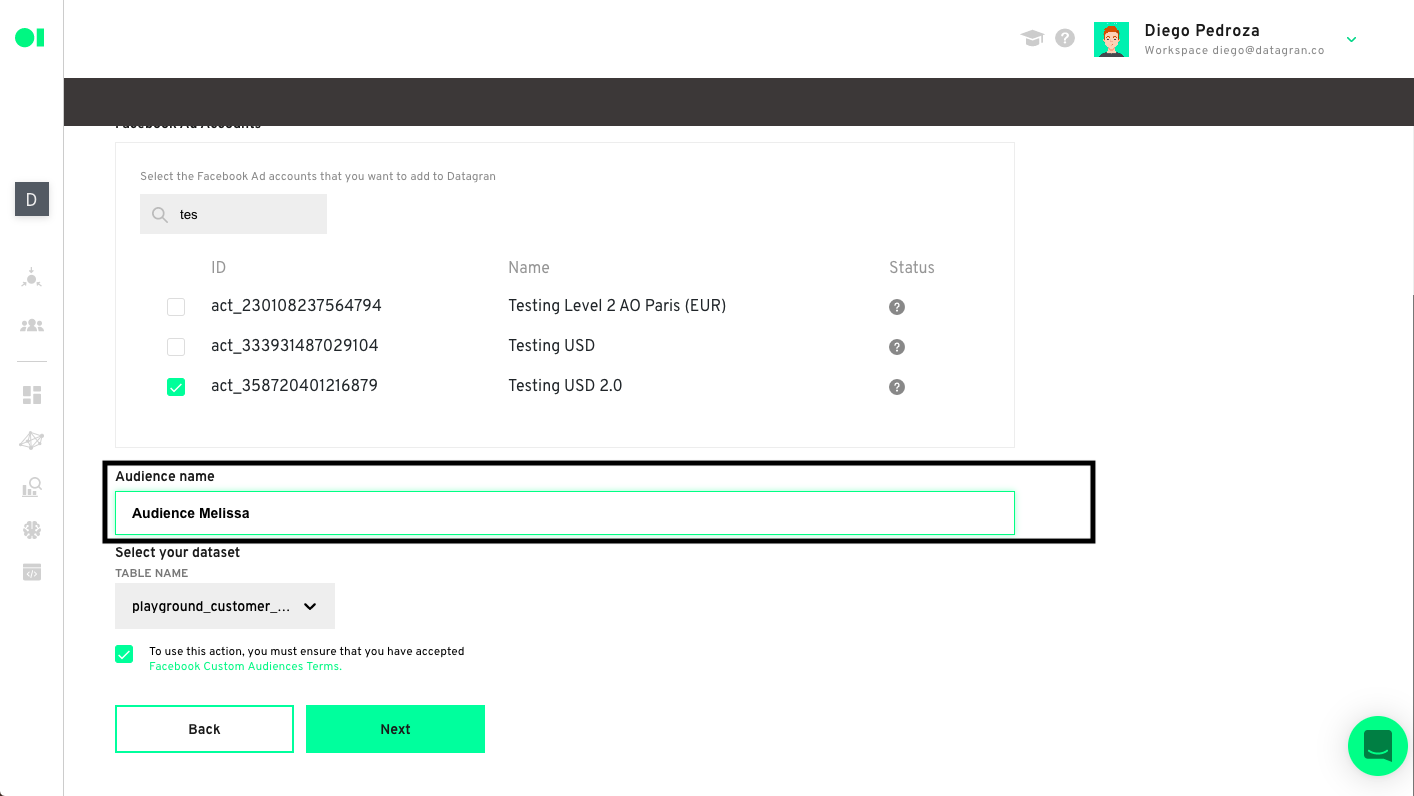
Select the dataset to extract information from in the drop-down menu.

Now, create a Custom Audience by selecting one of the options from the Customer Value dropdown menu.
Tip: Adding a customer value column allows you to create value-based lookalike audiences later on. This part is very important since it broadens your possibilities of targeting specific customers. For example, you can include those customers who have purchased multiple high-value items or have come back multiple times. Or you can let Facebook find more people similar to those best customers.

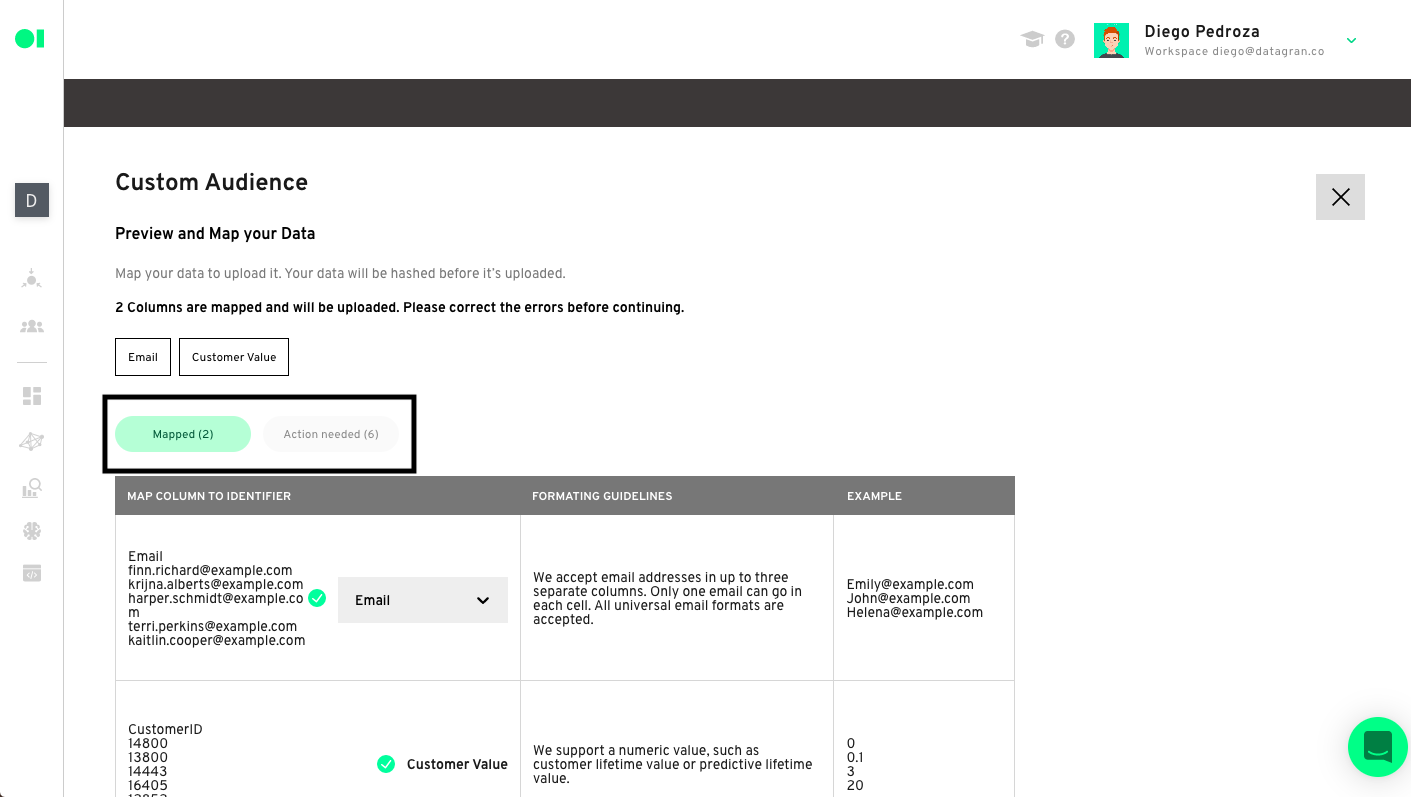
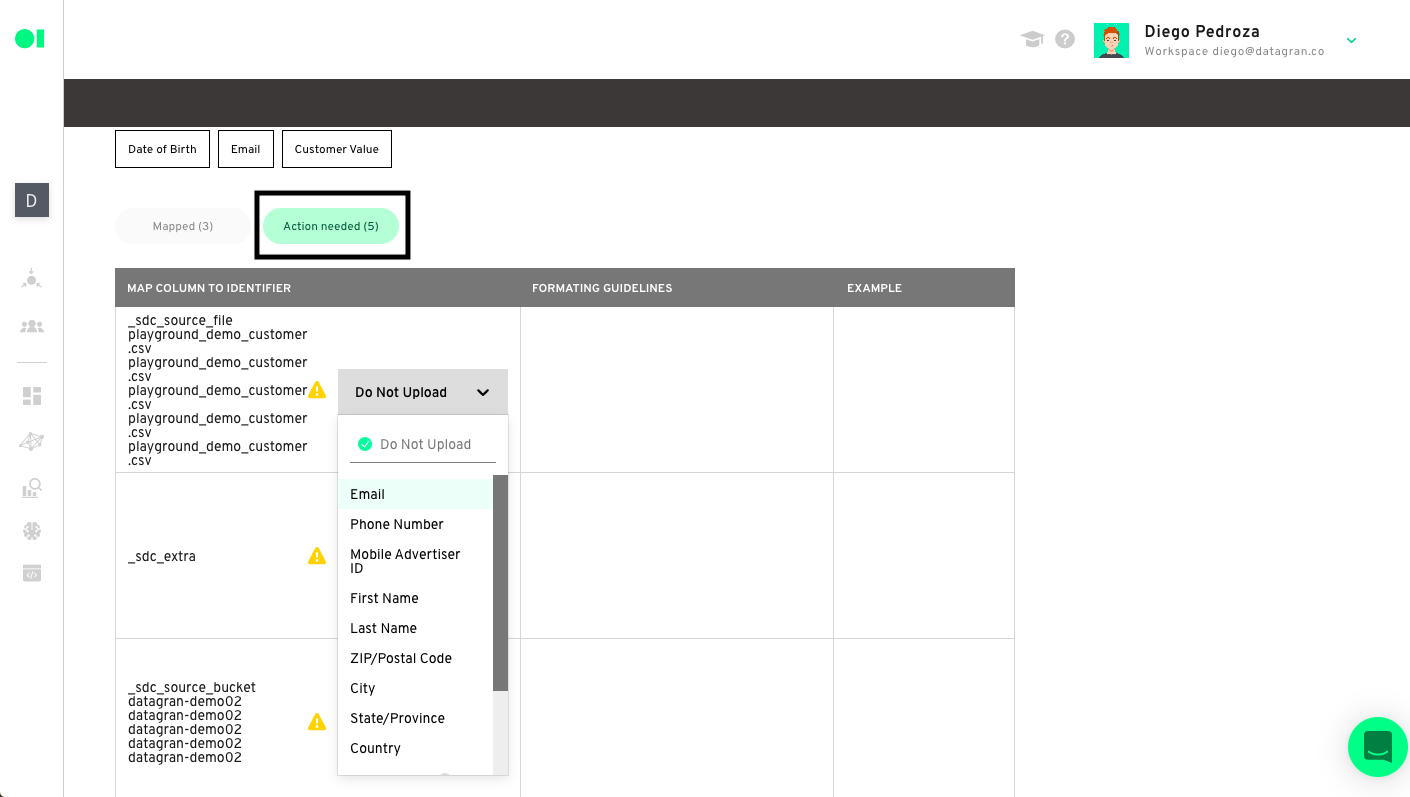
Preview and map out your data from map column to each identifier to ensure formatting is correct, adding your customer email, ID, and more. Click on each tab to view each one.
Now that you have specified your data identifiers, click Save, and Run your Pipeline.
And that’s it. Your Custom Audience of your Shopify customers will be pushed to your Facebook Ads account, where you can use it as a custom audience list.
Tip: The processing time for the audience to be exported to your Facebook account may vary depending on the volume of your dataset.

- Create a new campaign with the Custom Audience you just imported
Now it’s time to build an even more successful Facebook Ad campaign. Go back to your Facebook Ad Manager and create a new campaign, this time choosing your new Datagran-powered custom audience to target your existing customers and get them to shop again.
Or, build an ad campaign with a Lookalike Audience, and select your Datagran-powered custom audience to have Facebook find more people like your best customers.
Tweak the rest of the ad variables, build your ad campaign, and this time, your ad will bring in new people who, odds are, will want to click your ad and buy stuff from your Shopify store.
And now, your Shopify store should be in the 38% of successful Facebook advertisers, and you won’t have to wonder why your ads aren’t bringing in customers like you hoped.
The Facebook Audience Exporter is not the only powerful built-in Datagran tool—there are dozens of other useful tools included, from custom charts to visualize your Shopify store data to machine learning tools to build data models without the need to code.
With Datagran, you can make the most of your Shopify store’s data, build more effective Facebook Ads, and get more out of your data with additional analysis tools like RFM analysis, clusterization, algorithms, and more. Check out the Datagran Academy for more tutorials.

.jpg)

